keyboard_arrow_left
keyboard_arrow_right
Our webstore uses cookies to offer a better user experience and we recommend you to accept their use to fully enjoy your navigation. More information
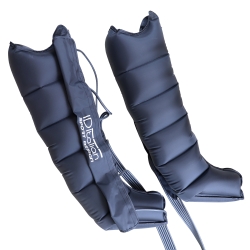


Sports pressure therapy boots are indicated for use to reduce swelling and prevent thrombosis in the lower extremities or the treatment of truncal lymphoedema, primary lymphoedema, oedema after trauma and sports injuries, post-immobilisation oedema, venous insufficiencies, lymphoedema.
The sports pressure therapy boots consist of an air compression system that is performed sequentially, from distal to proximal, helping to improve blood and lymph circulation, and to prevent DVT and alleviate lymphatic oedema. With total user control as the user can choose between 5 types of massage with 5 intensities each.
- Sequential inflation technology.
- 6 independent air chambers.
- 5 massage modes
- 7 levels of compression.
- Boot size 100 x 70 cm
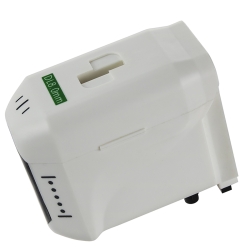
- With control console.
- Control console and compressor in one device.
- Working time 10 to 60 min.
- Memory function.
- Automatic shut-off.
- Manufactured with high quality materials.
- Electrical protection.
Step 1 Insert the main plug of the AC adapter into the 220~240V electrical outlet. Or battery powered.
Step 2 Check if the hose is properly connected to the hose nipple(s) if yes, go to Step 3; if no, attach the hose nipple to the outlet hose(s).
Step 3 Connect the main end of the connecting hose to the control console outlet.
Step 4 Check and firmly secure all connections to the main unit and to the hose. The air outlets of the boots must face upwards.
Step 5 Put on the boots.
CAUTION The connecting hose must not be placed on the neck to avoid strangulation or neck injury.
Step 6 Press the "" button to switch on the appliance.
Step 7 Adjust the pressure by pressing the "" or "" button.
Note For the first use, it is best to start with the pressure not too high, maybe 120 or 150 mmHg, and then you could adjust the pressure to the level that makes you feel comfortable. Also the first use time should not exceed 20 minutes.
Step 8 Set the treatment time by pressing the "" key.
Note The time range is 10~60 minutes. When the time is up, the machine turns off automatically.
Step 9 Select the mode by pressing the "" key.
Step 10 Set the camera by pressing the "" key.
Note If you want to deactivate some camera such as ①, press the corresponding "" key to close it; if you need to activate it, press "" key again. When the camera turns off, it means the camera will not work. The blinking indicator means the camera is working.
Step 11 During treatment, press the Start key "" to pause treatment. Press it again to resume treatment.
CAUTION Do not open the boot(s) during treatment. Damage to the hoses may occur. Always turn off the appliance before unzipping.
Step 12 At the end of the treatment session, simply disconnect the hose from the machine by pulling on the main end of the connecting hose.
CAUTION It is best not to disconnect the hose from the boot frequently to ensure a tight connection.